Not a gymnastics balance beam
This isn’t a square balance beam like you’d find in a gymnastics class. It’s more like a railing, the edge of a bench, or the top of a bike rack: a tube with an outer diameter of about 2 inches.
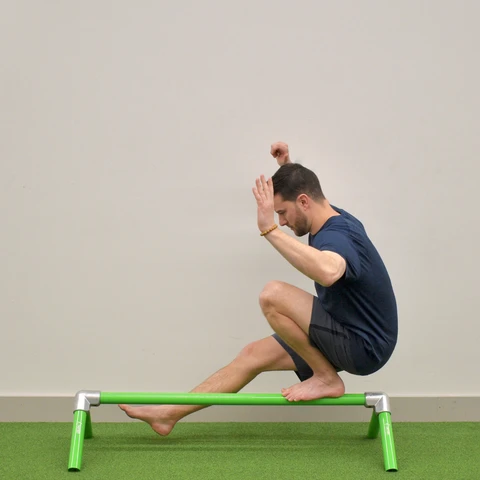
Image from TFC Shop
This balance beam has been popularized on by The Foot Collective (Instagram), who makes and sells them in Canada and internationally.
The Foot Collective Balance Beam is a challenging and fun way to pass time, work on ankle stability, improve balance, challenge your trunk muscles, and stimulate your brain.
One problem: the price. TFC Beams have a high price because they are selling gym-quality equipment that’s made in Canada (plus they’re a small business and your support goes into furthering their mission.)
While noble and good, paying $300 for a 6-foot beam can be a tough pill to swallow.
In this post, I share my adventures trying to recreate the TFC balance beam at the lowest cost possible, for those of us out there who don’t need gym-quality equipment.
I would say that, even if you do end up building your own balance beam, The Foot Collective’s Beam Tribe program is an excellent investment. They have progressions for tricks on the beam as well as loads of educational material on the theory of becoming a healthy, vibrant individual.
How I found out about The Foot Collective
In fall 2018, I started to experience pretty annoying and persistent pain from plantar fasciitis. I’ve always been told that I have flat feet, and for many years wore prescription orthotics. For the most part, my symptoms were minor. Basically, I didn’t like walking or standing for a long time.
Plantar fasciitis was different, though. It hurt. It hurt a lot. I couldn’t really walk without limping and it really messed up with my daily walking commute of two and a half kilometers (one and a half miles) to work. I wanted a fix.
My first attempt at fixing plantar fasciitis was an over-the-counter orthotic. I was on vacation and visited a running store and ended up purchasing a Sole brand orthotic. At first, wearing it was a tad painful, but as it molded to my foot, I was able to resume my walking commute again.
The relief from the orthotic wasn’t long-lived, though. I continued to do some activities barefoot, such as Muay Thai kick boxing classes, as well as not wearing orthotics in the house. I also debated purchasing more orthotics to outfit the various footwear I had. It was getting expensive.
It was at this point that a little birdie told me that it’s possible to retrain your arch and eliminate flat feet. I had heard this once or twice before, but I didn’t really think much of it. If flat feet were something that you could “exercise” out of, wouldn’t everyone do that instead of orthotics? Nevertheless, I wasn’t exactly thrilled at the idea of spending hundreds of dollars per year for the rest of my life to continue using my own feet without pain, so I decided to do some reading.
I can’t tell you any single resource that really made the difference for me, but after I started doing some foot strengthening exercises and learned how hip rotation affects your leg’s alignment, and combining all this knowledge to develop healthier habits and feet, I fixed my problem.
For real this time. No orthotics. No flat feet. No motion-controlled footwear. Just… happy feet that didn’t hurt.
I’m happy to share with you some resources about natural movement and health that I loved and that had a huge impact on my daily habits:
- Simple Steps to Foot Pain Relief: The New Science of Healthy Feet by Katy Bowman
- Deskbound: Standing up to a Sitting World by Kelly Starrett
- Born to Run: A Hidden Tribe, Superathletes, and the Greatest Race the World Has Never Seen by Christopher McDougall
- Run for Your Life: How to Run, Walk, and Move Without Pain or Injury and Achieve a Sense of Well-Being and Joy by Mark Cucuzzella, MD
It wasn’t “easy”, per se, but it really wasn’t hard or expensive. Developing foot strength hurts as much as any exercise program in that you’re building up underused muscles. Additionally, switching to more minimal footwear (and ditching the orthotics) required some care and attention to ensure that you don’t go too fast, too soon. It’s also a bit of a mental leap to decide to get rid of conventional shoes and make the change to minimal footwear.
Somewhere along my journey, I found The Foot Collective which has a retail store front in Ottawa, where I tried out a beam and purchased some shoes.
The beam: Why?
The beam is a challenging and fun way to improve your ankle stability and strengthen your foot. For some people, just stepping on the beam is painful. As your foot gets stronger, it becomes easier.
There are lots of fun ways to play on the beam alone or with a friend. You can each hang out on one foot and see who can stay up the longest. You can try walking across with your feet facing in the same direction, opposite, or on the ball of your foot. You can do pistol squats, perch, jumps, and so much more!
After trying a beam, I wanted one. I didn’t, however, want to drop a heck of a lot of money on one.
The beam: Specs
Beam
- Type: Schedule 40 1.5” pipe (size 8)
- Outer diameter: 1.89”
- Material: aluminum
- Paint: anodized
- Color: green, gold, red, and more on their shop.
- Details: laser etching of their brand
- Length: 1 foot to 6 feet
Fittings
- Option 1: Rubber cradle
- Option 2: Corner elbow outlet (in order to attach additional beam legs)
- Option 3: 3D-printed cradle (unreleased at the time of writing)
Rebuilding the TFC Beam directly
Let’s say we just try to gather materials that match the specs of TFC’s beam, as an individual.
The corner elbow outlets are Kee Clamps, and the model they use seems to cost around $40 CAD. We need one at each end of our beam, which costs us about $80 CAD.
Next up, the schedule 40 1.5” 6061 aluminum pipe. Finding this kind of pipe is very difficult because it tends to be marketed only business-to-business and not to the end consumer. A rough price that I was able to find was about $13 CAD per foot, but this excludes shipping and any minimum quantity for purchases.
Finally, the painting. I’m assuming that whenever the pipes are being purchased from, anodizing is an upcharge. Let’s put it somewhere in the neighbor of $2 CAD per foot, acknowledging that this could be more or less depending on whether the shop itself is performing the anodizing.
So let’s say you buy all these pieces the same, and your goal is to make a 6-foot beam with two Kee clamps and four 1-foot legs.
- Size 8 Schedule 40 aluminum piping, 8 feet, anodized: $15x8
- Kee clamp corner elbow outlet: $40x2
- Total: $200
Buying the same from TFC:
- Pair of 12” legs: $50x2
- TFC elevate beam with couplings: $295
- Total: $400
Mind you, they’re absorbing costs for shipping, buying at quantity, getting a custom paint job, adding laser etching, all on top of trying to run a business. You also get free access to some online materials to learn about the beam. Also, you might have trouble cutting the beam yourself if you don’t have the proper tools.
Overall, not bad. But we can do better.
Cutting Costs
The pipe
Okay, so let’s challenge some assumptions. Is schedule 40 aluminum pipe really necessary? Aluminum is expensive and schedule 40 is thick. Can we make do with a cheaper pipe with the same outer diameter?
After walking aimlessly around Home Depot for an hour, yes, you can! I found a steel chain-link fence post that’s anodized in black and is sold at a 7.5 foot length for only $18 CAD.
That’s $2.4 CAD per foot compared to $13, or only 18% of the cost. But is the the right diameter? It’s actually a fraction of an inch larger than schedule 40 size 8, but I’m still able to insert fittings over it without issue. So: yes. It’s the right size.
How about the weight? It’s about 8 and a half pounds. The aluminum pipe at the same length would be 7 pounds. It’s about 20% heavier, which isn’t a big deal.
Is it strong enough? At 7.5 feet, this is a foot and a half longer than the largest size that TFC sells. I’ve played with the TFC beam and the steel fence post beam, and I’d say that the flex is similar. One difference is that the steel beam retains more heat so it gets warm more quickly during usage.
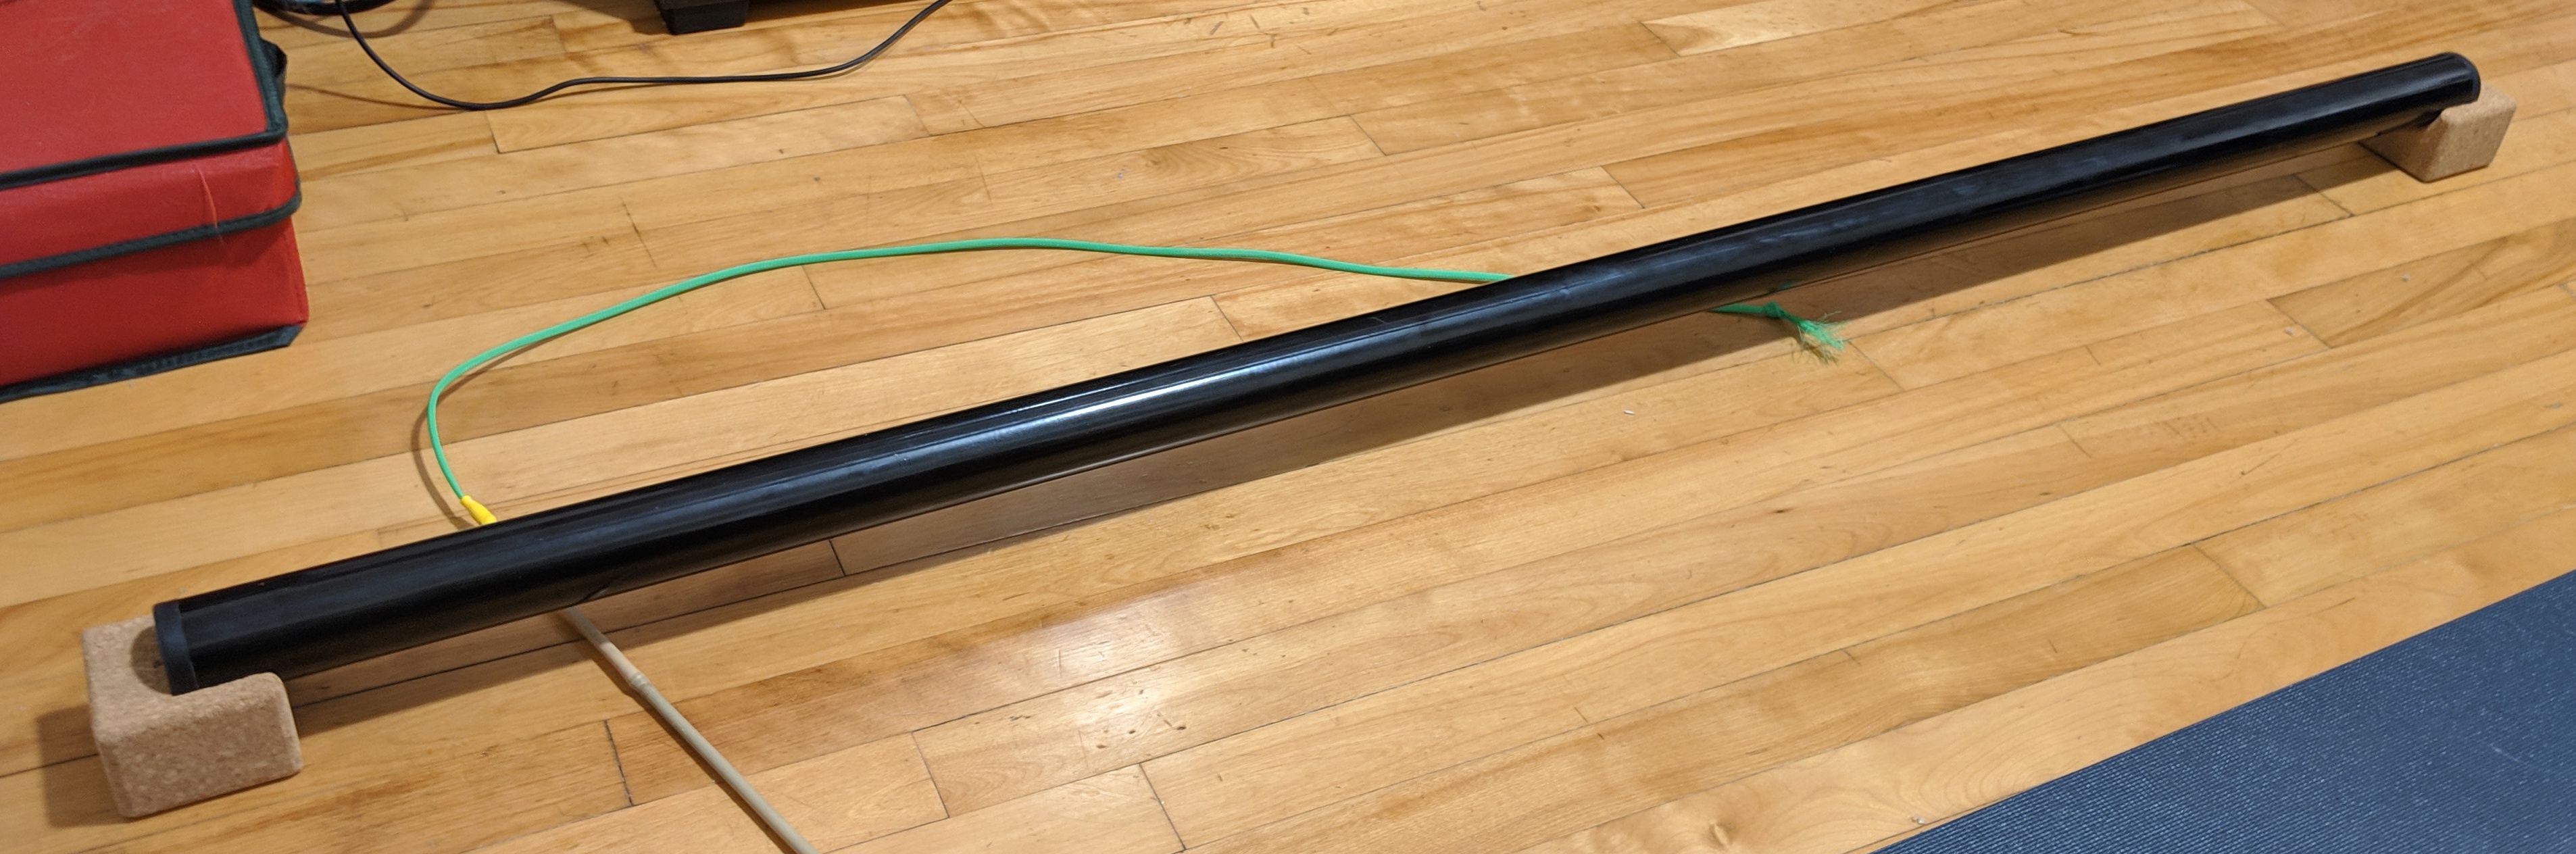
The cradles
If you’re not worried about legs, the TFC rubber cradles at $45 aren’t the worst option.
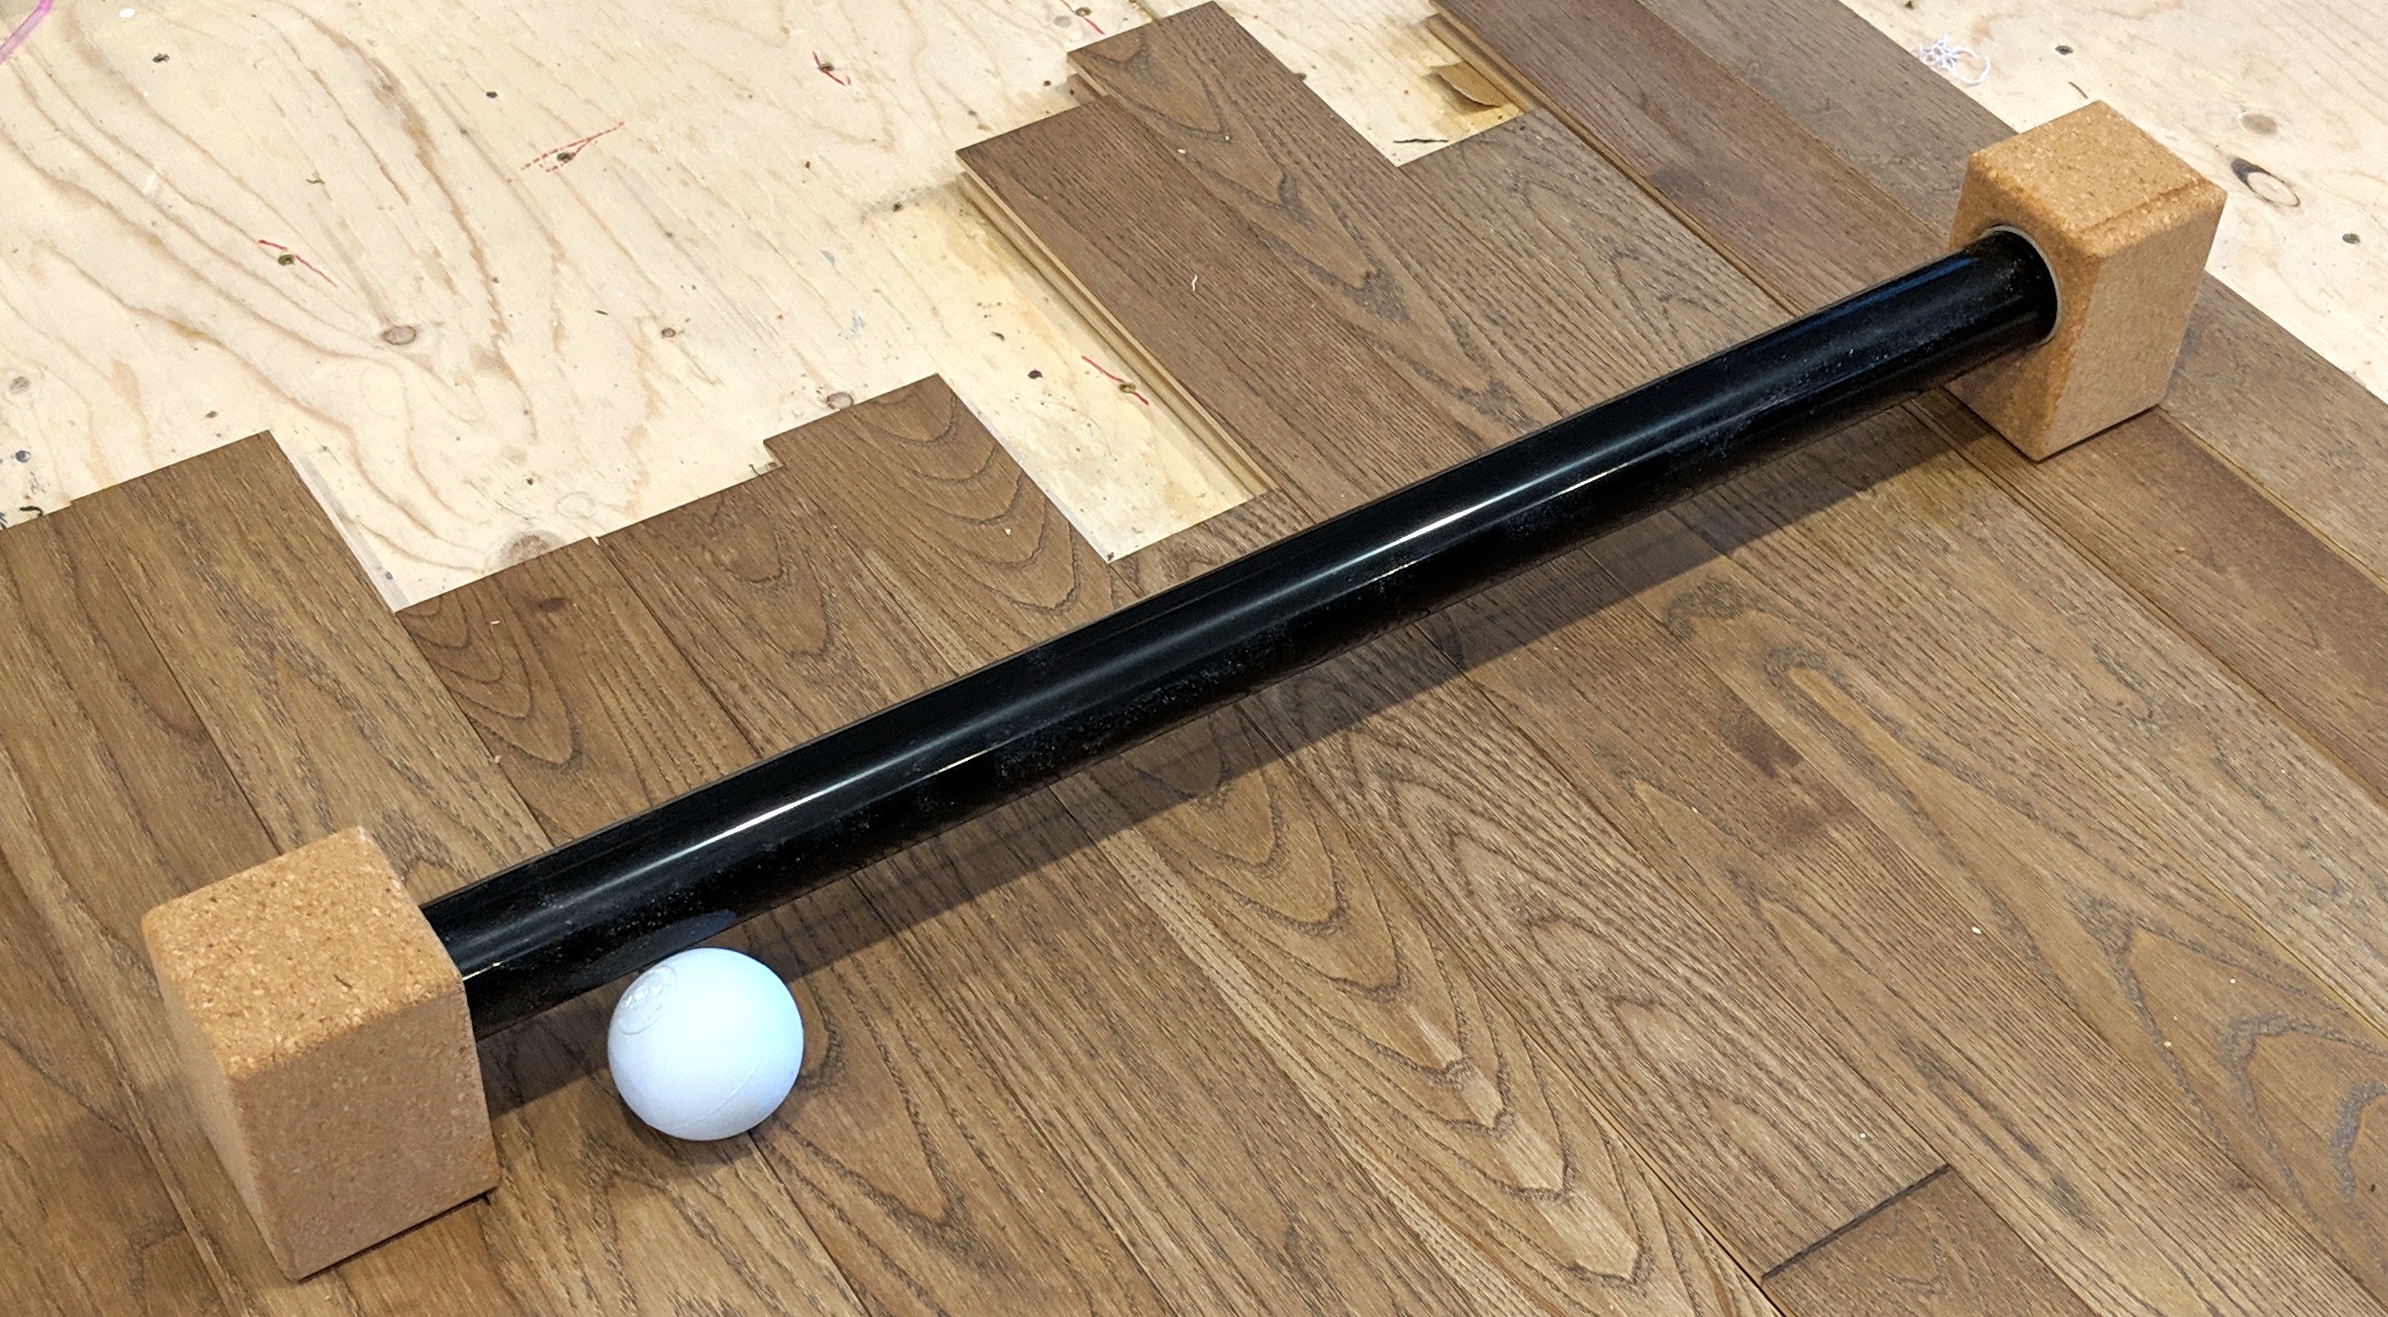
One idea is to cut your own cradles out of wood. I had some minor luck buying a $10 CAD cork yoga block and cutting two pairs of cradles out of it. They’re not the most stable thing in the world, but a table saw paired with a Dremel will give you good results:
If you’re really cheap, you can just mount the beam between two bath towels folded up on the floor, but this is obviously an ugly solution.
The fittings
If you’re not worried about gym-like-quality, we could always revert to ABS or PVC fittings. ABS will be black and might look nicer, but PVC (white) will be stronger.
Some ideas for mounting are:
- Corner outlet elbow, no additional legs
- Corner outlet elbow, short PVC legs (anything longer than 6”, I’d be worried about breaking)
- Corner + tee to form a triangle. I tried this myself below.
Necessary tools
If you’re buying any piping at length and not cut into the sizes you need, you’ll need a pipe cutter.
If you’re building a 7.5 foot steel fence post people and just making the fittings in plastic ABS or PVC piping, a saw will do okay.
But if you need to cut pipe, especially the metal pipe, you’ll want to get a good pipe cutter. Make sure that you buy one that’s made for steel (not plastic) and can cut up to at least 2 inches. This’ll run you at least $60 CAD and is the most expensive part of the project. Check your local tool library if you have access to one.
If you’re using kee clamps, you’re good to go with just the pipe, clamps, and cutter, as they have the self-attaching nuts.
If you’re using PVC or ABS piping and fittings, you’ll need to purchase appropriate glue. Depending on whether all your parts are the same material, the glue will change. There’s ABS cement, PVC cement, and transitional cement. This should be available at your hardware store for about $5 CAD.
The build: metal + PVC ($50)
Let’s check our tools and materials
- Fence post, $18
- PVC elbow fittings, $2x2
- PVC tee fittings, $2x2
- PVC couplings, $2x2
- PVC pipe, 6 ft, $10
- PVC cement, $5
- 6x Self-drilling 1” metal screws, $2
- Total: Around $50
- Saw
- Saw your pipe into:
- 2x 6” for height
- 4x 12” for stability
- Drill your elbow fittings onto the fence post, taking care to ensure they face the same direction. You can place your 1 foot segments of PVC into the fittings to help see if the direction is true.
- Use the PVC cement to attach your 6” pipes to the elbow fittings. Allow a couple minutes to cure for handling.
- Use the PVC cement to attach your tee fittings to the bottom of each 6” pipe.
- Use the PVC cement to attach your 12” pipes to the tees in order to form the base of support.
- Use the PVC cement to attach your couplings to the ends of the 12” pipes to make little feet.
Here’s my version that uses ABS. My direction wasn’t super true when drilling in the initial elbow fittings, so my end result was a little wobbly.
The build: metal + yoga block ($40)
- Fence post, $18
- Cork Yoga block, $10
- Plasti Dip, $10
- Total: Around $40
- Pipe cutter
- Dremel, hole drill bit, or saw
- Sandpaper
- Cut the fence post to your desired length. For this project I cut the post into a 5 and 2.5 foot length.
- Cut your yoga block into a block that’s more wide than it is tall for stability.
- Use your Dremel, hole drill, or saw to make a cup that’s 3/4 of the way in to your block. A cup of the same diameter (1.9”) as your pipe is ideal. A triangle with a saw might also work but won’t grip the pipe as well.
- Use PlastiDip to coat the outer centimeter or half inch of your piping, as it will be very sharp to the touch. Consider sanding the edge first to reduce sharpness further.
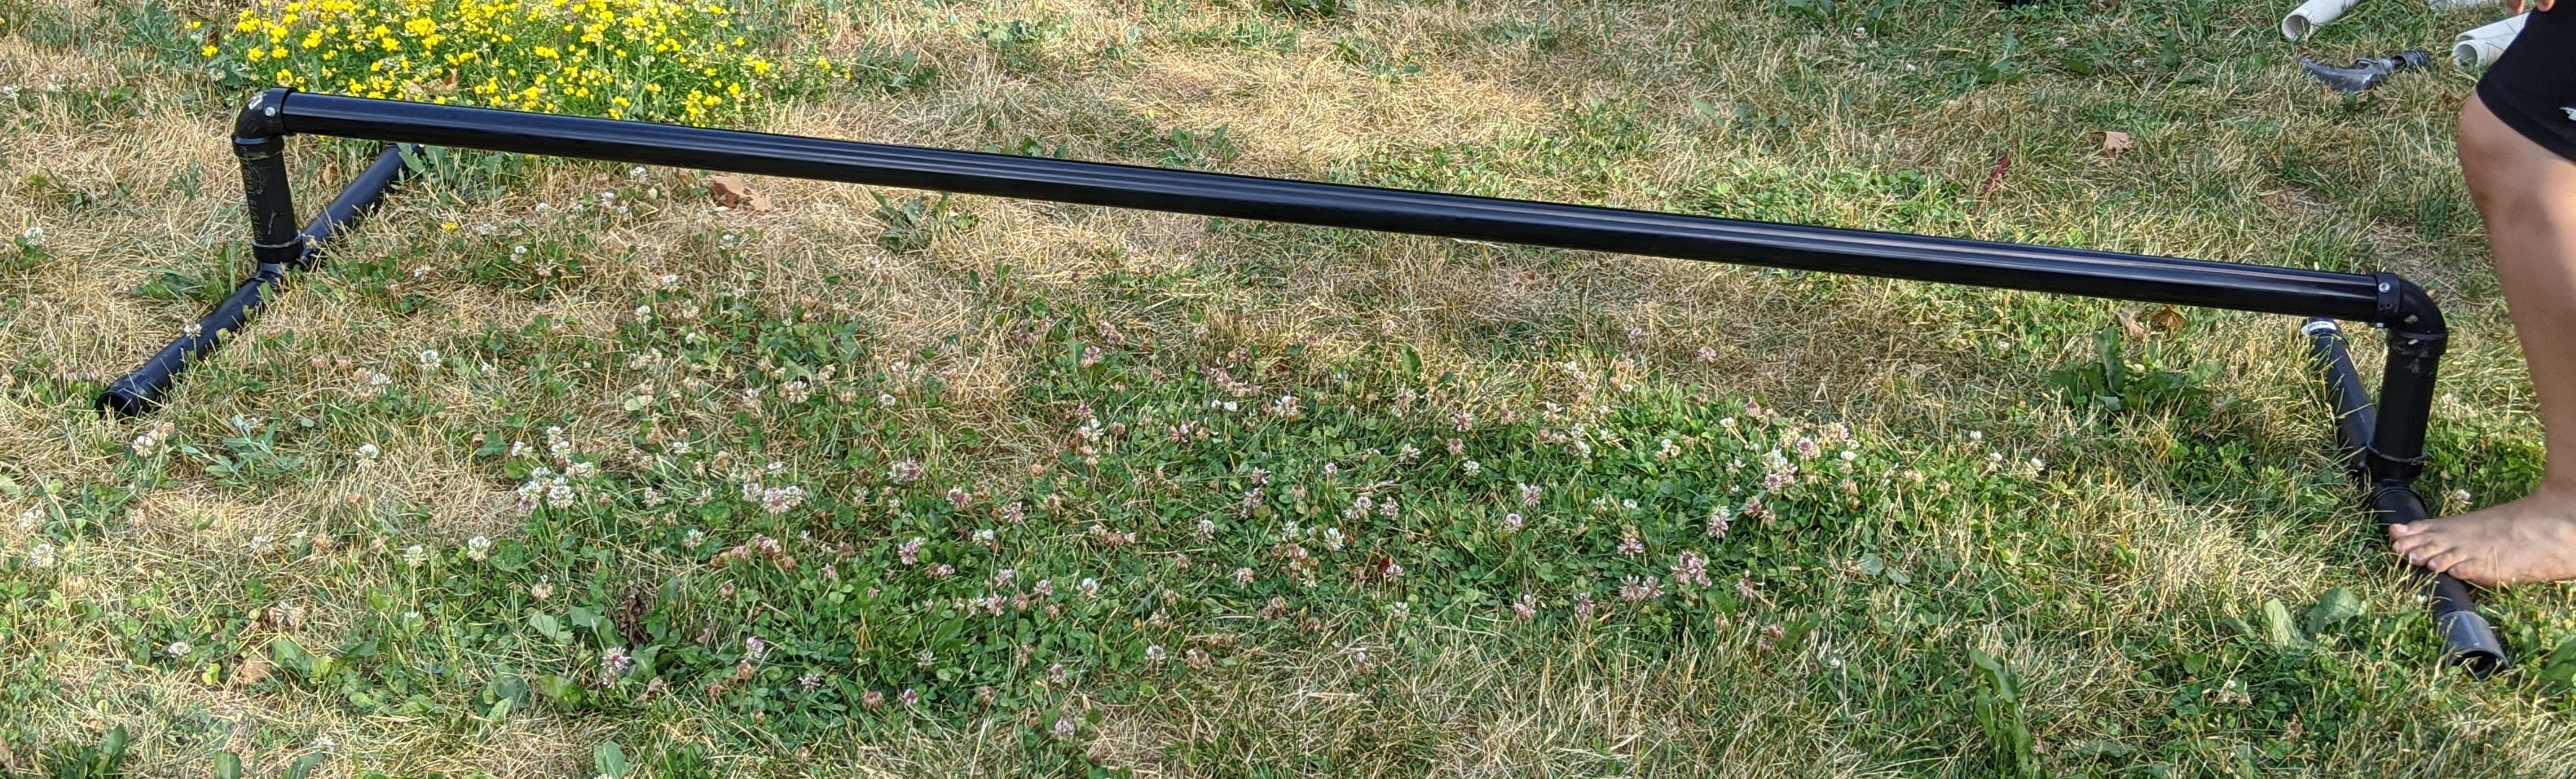
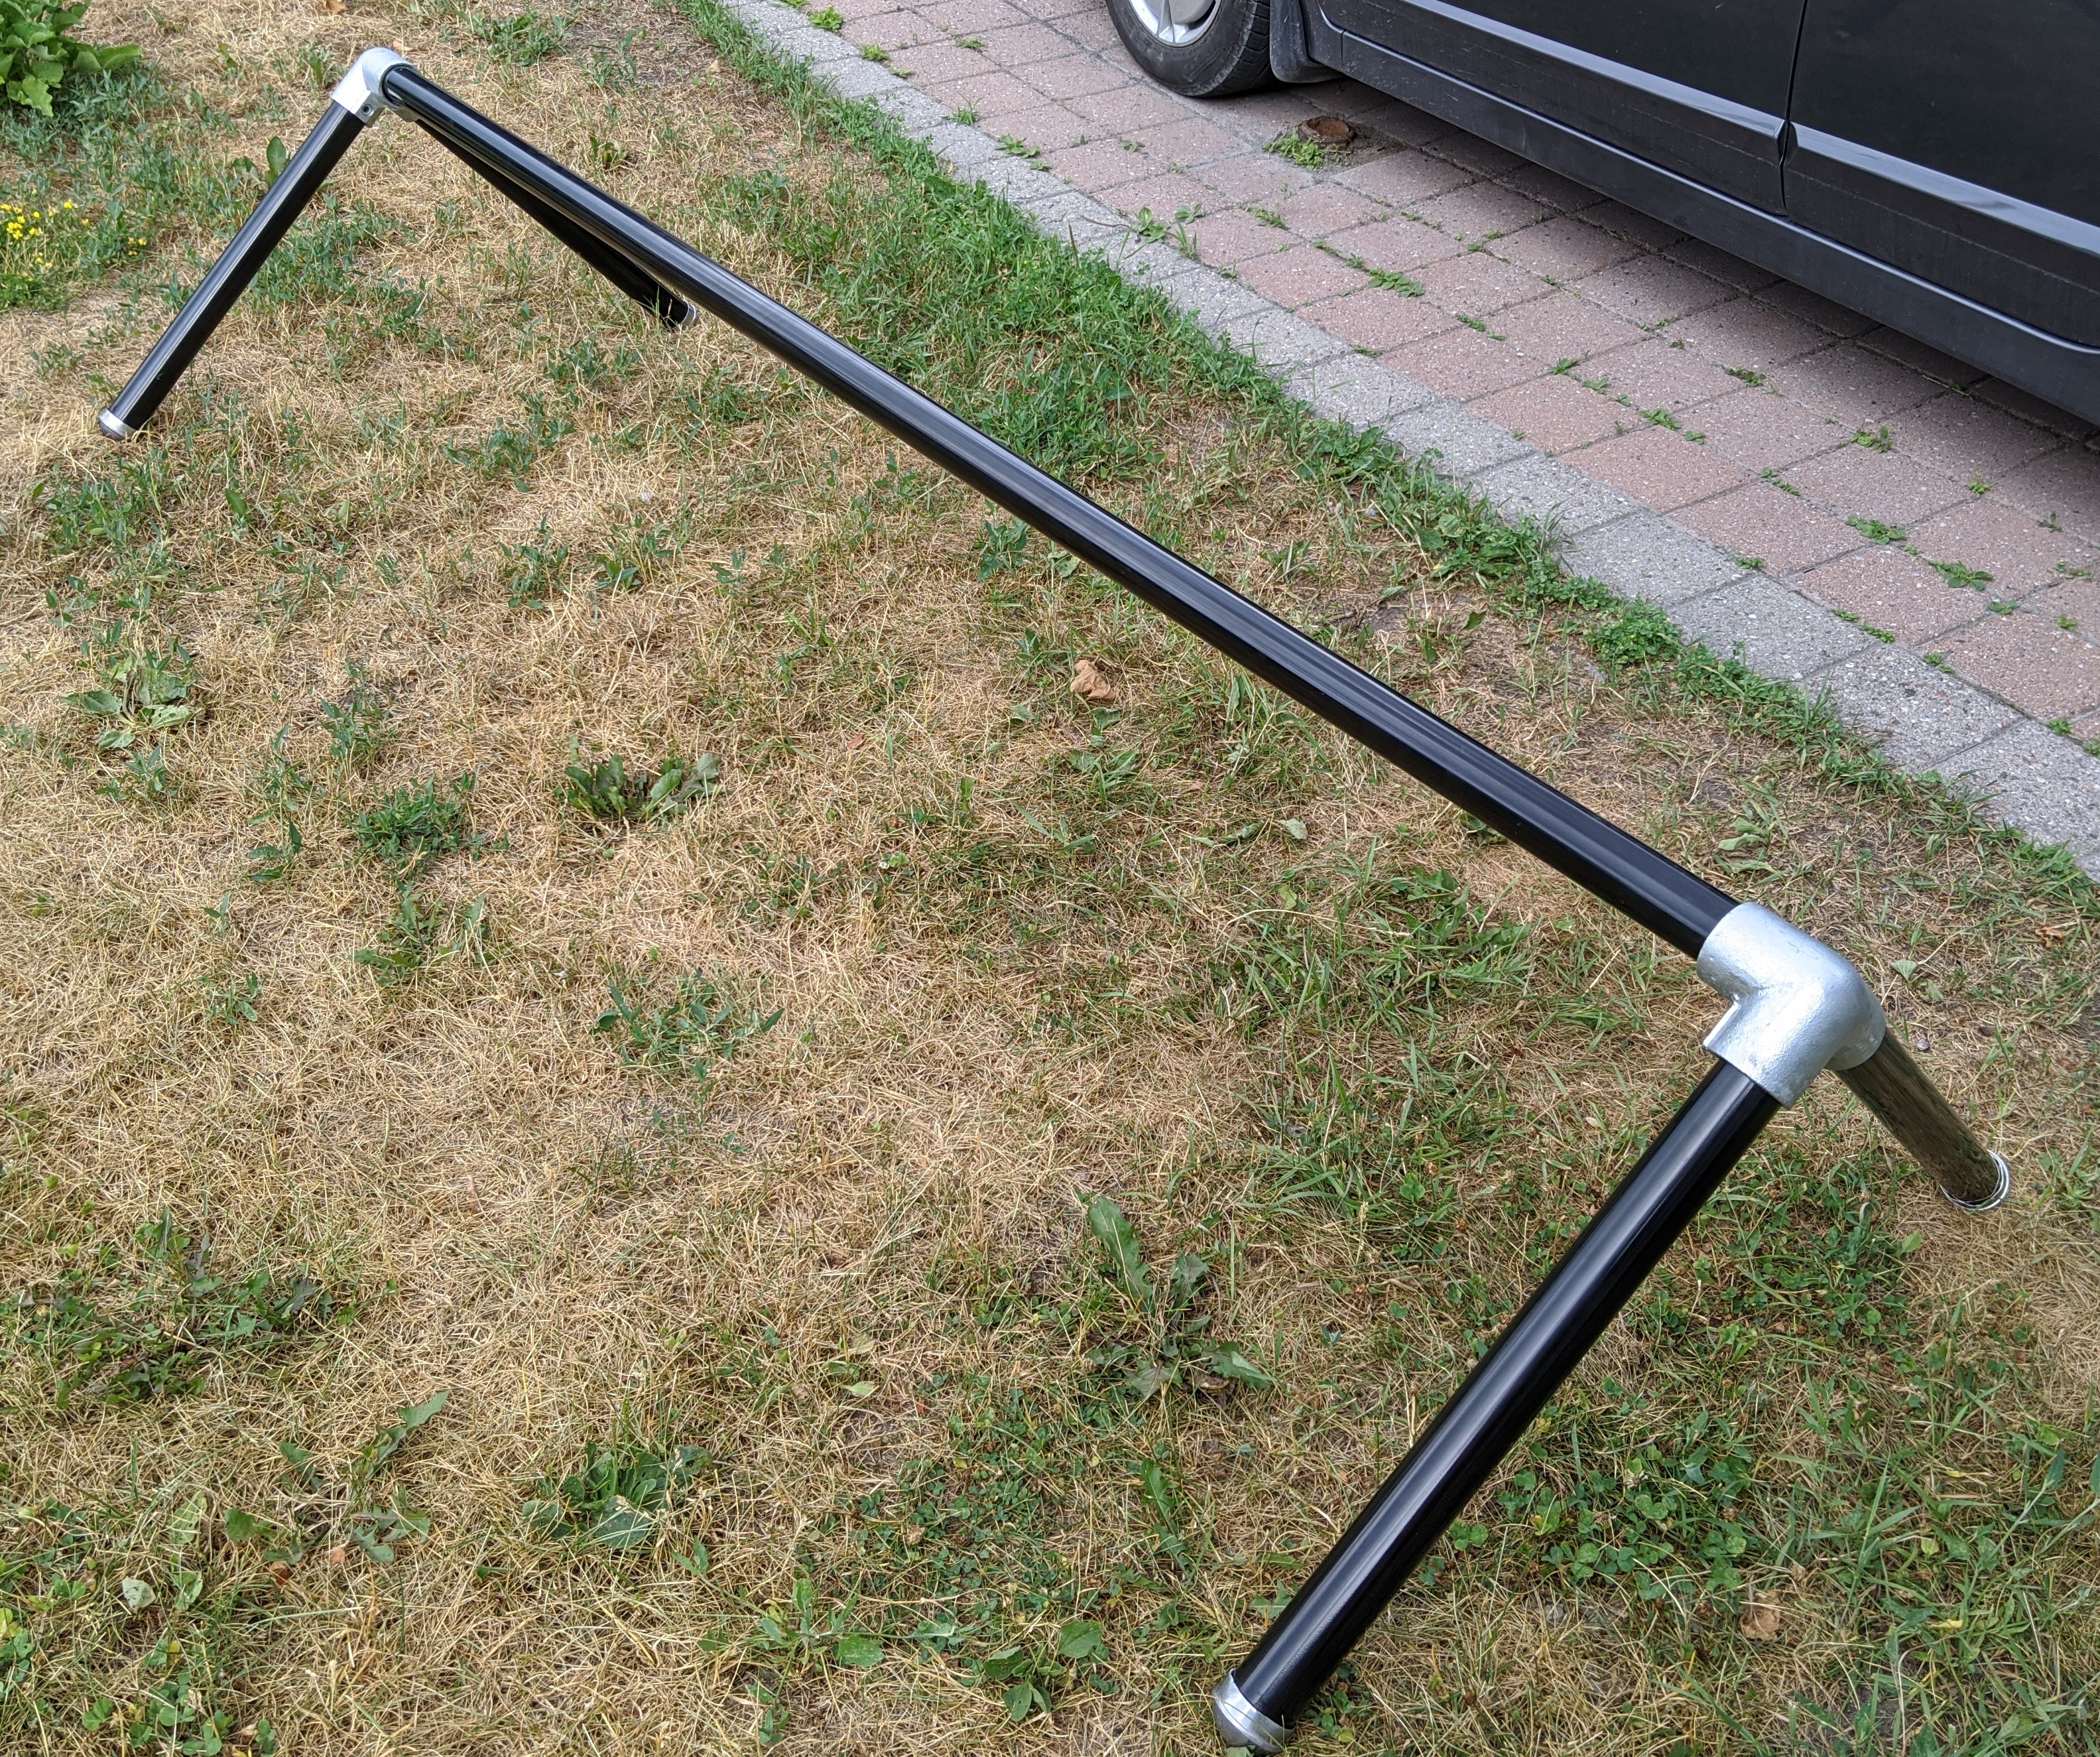
The build: full-metal ($120)
This is the closest that we’ll get to the TFC beam.
- Fence post, $18x2
- Kee Klamp 20-8 Corner elbow outlet, $39x2
- Total: Around $120
- Pipe cutter
- Cut one fence post into 4 legs: 22.5” each
- Attach your kee klamps to each side of the uncut post
- Attach the legs to the kee klamps
This is one tough beam with a great vertical height, and is comparatively affordable at about 25% of the cost of the equivalent TFC beam.
Conclusion
With a little elbow grease, we can make beams for indoor and outdoor use. The effort is definitely higher than just ordering from TFC, but it’s a great option if you’re on a budget.
Remember to join the TFC Beam Tribe to get access to their progressions and educational material. Happy beam journey!